Unlock the Power of Microgreens: Why Grow Them at Home?
Microgreens are gaining popularity fast, and it’s no surprise why. These vibrant, nutrient-packed young greens can transform meals, add fresh flavor to your kitchen, and—they’re incredibly simple to grow indoors. With just a few basic tools and some light, you can have a lush harvest in as little as 7-14 days. Whether you live in a bustling city apartment or a cozy suburban home, microgreens make it possible to enjoy fresh greens all year round.
What Are Microgreens?
Microgreens are the tender young shoots of edible plants, typically harvested within a week or two of sprouting. They’re younger than baby greens but older than sprouts, offering a unique combination of concentrated flavors, vivid colors, and impressive nutrition. Popular varieties include sunflower, pea shoots, radish, broccoli, arugula, and even mustard. Each type brings a different taste and color to your plate.
Health Benefits: Tiny Greens, Big Nutrition
Did you know microgreens can contain up to 40 times more nutrients than their mature counterparts? That’s right—these tiny leaves are bursting with vitamins (like A, C, K), minerals, antioxidants, and enzymes that support your immunity, metabolism, and overall well-being. Adding microgreens to your meals is a fantastic way to elevate your daily nutrition effortlessly.
Why Grow Microgreens at Home?
Growing microgreens at home is rewarding for several reasons:
- Freshness You Control: You harvest your greens when you need them, ensuring unmatched flavor and crispness.
- Cost-Effective: Store-bought microgreens tend to be pricey. Growing your own saves money and lets you experiment with different varieties.
- Low Space Required: Even a sunny windowsill is enough. Perfect for small spaces and city dwellers!
- Satisfaction: Few things beat the joy of watching tiny shoots transform into edible greens right in your kitchen.
The Best Microgreens to Start With
If you’re new to microgreens, some easy and reliable choices include:
- Sunflower
- Pea shoots
- Broccoli
- Radish
- Mustard
- Basil
- Arugula
- Cress
These all germinate quickly and have distinct, delicious flavors to liven up salads, sandwiches, or garnishes.
What You Need: Simple Microgreens Growing Kit
Getting started is easier than you think. Here’s your basic “microgreens kit”:
- Seeds: Choose high-quality seeds labeled for microgreens.
- Shallow Containers or Trays: Recycled food containers, nursery trays, or special microgreen trays all work if they are about 1-2 inches deep.
- Growing Medium: You can use organic potting mix, coconut coir, or even a paper towel (for certain varieties).
- Spray Bottle: For gentle watering.
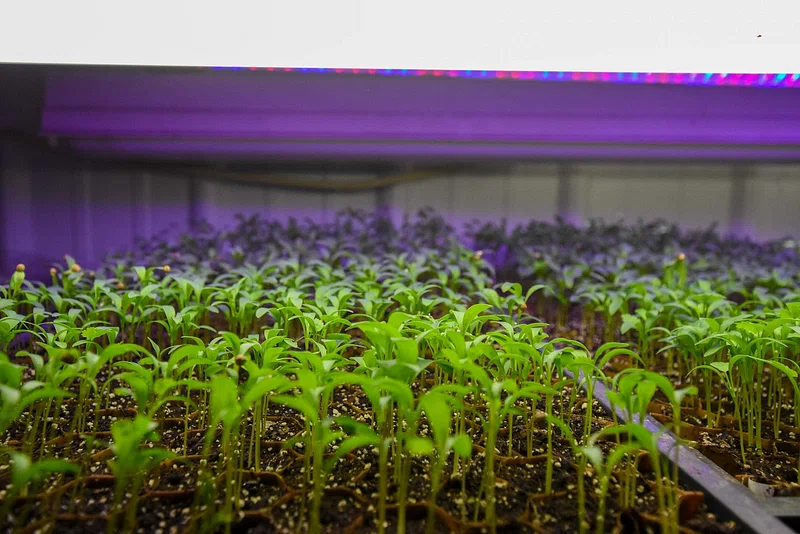
- Light Source: A bright windowsill works, or you can use LED grow lights for best results year-round.
Step-by-Step: How to Grow Microgreens at Home
1. Prepare Your Trays
Fill your tray with about an inch of moist growing medium. Smooth the surface gently.
2. Sow the Seeds
Sprinkle seeds evenly over the surface. There’s no need to bury them—just press them lightly into the soil.
3. Mist and Cover
Mist seeds with water using the spray bottle. Cover the tray with a lid or plastic wrap to keep humidity high during germination.
4. Germination (2–4 days)
Place your tray in a warm, dark spot. Once most seeds have sprouted and tiny shoots appear, remove the cover.
5. Let There Be Light
Move your tray to a sunny windowsill or under grow lights. Microgreens need at least 6-8 hours of light daily to grow strong and vibrant.
6. Water with Care
Continue to mist lightly once or twice daily. Avoid overwatering—ventilation helps prevent mold.
7. Harvest Time!
Microgreens are ready to harvest when they’re about 2–3 inches tall (usually 7–14 days from sowing). Use sharp scissors to snip greens just above the soil line.
8. Enjoy and Repeat
Rinse and enjoy your microgreens fresh. Replant every week for a continuous supply.
Pro Tips for Thriving Microgreens
- Rotate Varieties: Try new seeds for flavor and nutritional diversity.
- Sanitize Your Trays: Wash trays between plantings to prevent mold or disease.
- Don’t Overcrowd: Give seeds space for airflow and healthy growth.
- Harvest Young: Overgrown microgreens lose tenderness.
- Careful Watering: Always water from the bottom (if possible) to keep leaves dry and prevent rot.
Delicious Ways to Use Microgreens
Sprinkle fresh microgreens on:
- Salads and Buddha bowls
- Avocado toast
- Sandwiches and wraps
- Smoothies
- Soups as a vibrant garnish
- Stir-fries (add just before serving)
- Even omelets or pizza
Microgreens offer endless ways to brighten dishes with flavor, color, and nutrients.
Common Questions About Growing Microgreens
How much sunlight do microgreens need?
Most types need bright, indirect sunlight. A south-facing windowsill is perfect. If natural light is limited, use LED grow lights.
Are microgreens safe to eat raw?
Yes! Microgreens are intended to be eaten raw and add crunch to meals. Always rinse before consuming.
Can I regrow microgreens?
Generally, microgreens do not regrow well after cutting. It’s best to start fresh with new seeds for each batch.
What if I don’t have fancy equipment?
No worries! Use recycled food containers, old baking trays, or even shallow bowls. Microgreens are very forgiving.
Challenges and How to Overcome Them
- Mold Growth: Avoid overwatering, ensure good airflow, and clean trays before each use.
- Leggy Growth: Not enough light. Move your tray closer to a window or supplement with a grow light.
- Uneven Germination: Sow seeds evenly and cover for consistent humidity.
Environmental Impact: Small Greens, Big Difference
Growing your own microgreens can reduce food miles, plastic packaging, and energy used in commercial farming. It’s a sustainable choice that promotes healthier eating and minimizes waste.
Conclusion: Start Your Microgreens Journey Today!
Growing microgreens at home is a fun, simple way to enrich your meals with fresh flavor and supercharged nutrition. With just a few supplies and minimal effort, you can harvest delicious, home-grown greens every week, no matter your experience level. Whether you’re looking to live healthier, save money, or simply bring something green into your kitchen, microgreens are the perfect solution.
Ready to get started? Try growing your first tray this week and taste the difference! Share your microgreens journey with friends and family—you might inspire someone else to begin their own indoor gardening adventure.